Want to record professional voice over at home without background noise? Discover expert tips for soundproofing your home studio, optimizing acoustics, and choosing the right equipment for broadcast-quality voiceover services and seamless audio production.
Posted Jun 6, 2022·Updated Aug 15, 2026·11 min read
Share
Key Takeaways
Soundproofing means blocking the external noise that can leak through gaps in doors, windows, and walls.
Selecting a room insulated from kitchens, bathrooms, laundry rooms, and other noisy rooms is the first step in ensuring an effective home studio setup.
Proper insulation materials like mass-loaded vinyl (MLV) can significantly improve sound isolation.
Isolation booths offer high-quality soundproofing, though your recording space and the equipment you need to fit into it will be restricted by the size of the booth.
Acoustic treatment and proper equipment are just as important as soundproofing for professional sound recording results.
*Updated July 2026
To soundproof your home studio effectively, you must ensure doors and windows are properly sealed, walls are well-insulated, and you’re using dedicated acoustic tools or isolation booths to control external noise.
Home studios are a convenient and cost-effective way for most professional voice actors to record voice overs for clients.
But studios that aren’t efficiently soundproofed will only give you extra work in the post-production phase of the recording, or worse, make your recording unusable.
So, if you’re planning on creating a home studio for professional voice recordings, this article will explain how soundproofing works and the best way to ensure your space is perfectly set up to block out all unwanted sounds.
Is soundproofing different from acoustic treatment?
Yes. Soundproofing is the process of sealing off a room so that outside noises can neither enter the room nor leave it.
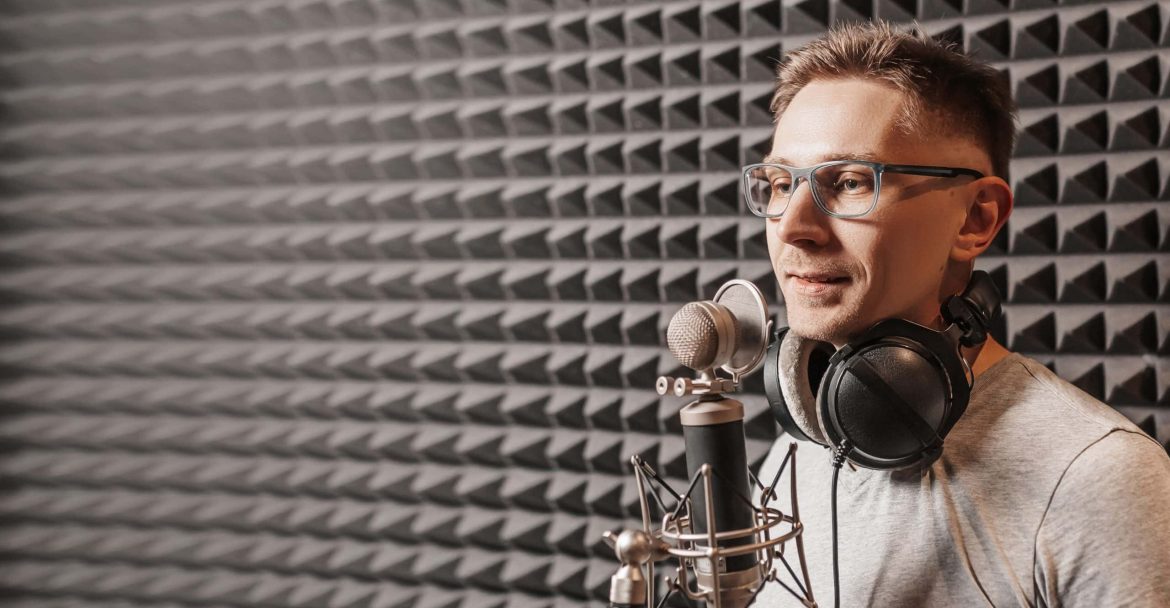
Acoustic treatment involves minimizing reverberation with sound-absorbing panels to improve the sound quality inside a room.
How important is picking the right space?
Picking the right space for your home studio is important, as its layout, its level of insulation, and its flooring all affect audio quality.
It’s critical to choose a room that is insulated from kitchens, bathrooms, laundry rooms, and any other noisy rooms.
You should also avoid windows that face the street (or your loud neighbors).
Consider any other elements that could impact audio quality.
Hardwood floors, for example, will increase reverberation and make acoustic treatment more difficult.
How relevant are doors to soundproofing?
Doors are hugely relevant when it comes to soundproofing your home studio, as they generally have air gaps.
Lightweight doors don’t insulate against background noises as well as heavy and/or treated doors.
When soundproofing your studio, you must first consider if there are any glass doors in the room you’re planning to use.
Glass doors will make the soundproofing process significantly more expensive.
If you do opt for a glass door, make sure it’s double-paned and has an STC (Sound Transmission Value) of at least 50, as this will make loud exterior noises hard to hear.
The same concept applies to doors made from particleboard or other low-density materials.
You’ll also need to deal with any gaps between the door and the ground.
If your doors don’t go all the way down, you can install door sweeps to block outside sounds from entering the studio.
How can windows be soundproofed in a home recording studio?
Windows can be soundproofed in a home recording studio by damping vibrations and sealing all air gaps.
For example, if you’ve commandeered a room in your home to make into a studio, it may have one or more windows facing onto a garden or a street.
The last thing you need is the sounds of the number 42 bus vibrating through your audiobook recording, so soundproofing these areas is a must.
Double or triple-glazed windows can help, especially if you use different glass thicknesses. This prevents the glass from vibrating at the same resonant frequency.
Other alternatives for soundproofing windows include:
Laminated glass is particularly good at reducing lower-frequency sounds such as traffic.
Acoustic inserts. These are custom-fit panels made of laminated glass or acrylic that fit onto existing windows and create an additional noise barrier.
Acoustic caulk, which can be used to seal up any cracks or gaps around the window frames, stopping sound from bleeding through.
If you’re willing to invest a greater amount of money, actual soundproof windows can block a lot of ambient noise.
Though the specific characteristics vary between models, these windows typically “surround” the main window with an extra pane on both the inside and outside.
One key aspect of soundproof windows is that one of the panes is angled in order to minimize reverberation.
Note that general vendors like Home Depot may not be able to cater to the specific needs of soundproofing.
You’ll probably be better off with a specialty provider with soundproofing experience.
How can I insulate walls for better soundproofing?
To insulate walls for better soundproofing, add dense materials such as mass-loaded vinyl (MLV) or an additional layer of drywall to help block sound transmission.
While doors and windows should usually be your first priority, soundproofing your walls can further improve the acoustics of your home studio.
This is especially important if you live in an apartment or share walls with neighbours.
MLV is a vinyl-based barrier with excellent sound-blocking properties and can be installed on ceilings and doors as well as walls to reduce noise transfer.
If you’re opting to add a second layer of drywall on top of the original, make sure to use a thicker sheet, such as ⅝”, to maximize the soundproofing effect.
We also recommend placing a soundproof substance like Green Glue between the two layers.
Check out the video below for more wall soundproofing ideas.
Can I use an isolation booth instead of a room?
Yes. You can use an isolation booth instead of a room for your new home studio, particularly if you don’t have a spare room available.
Isolation booths are pre-built structures that offer high-quality soundproofing and acoustics in a small space.
Like other acoustic equipment, isolation booths come in different shapes and sizes.
It comes with a sleek, professional design and built-in acoustics, which means no legwork required on your part.
With an isolation booth, you won’t have to worry about soundproofing or treating the room itself.
As long as you have enough physical space to fit the booth, you’ll be able to start recording as soon as you get it.
Of course, isolation booths also come with some obvious downsides.
First, you’ll need somewhere to store the booth when it’s not in use.
Before purchasing, check the dimensions to make sure you have enough space.
Furthermore, your recording space will be restricted by the size of the booth.
With a soundproof studio, you’ll be able to use the entire room.
If your only recording area is a small booth, you’ll have to fit all of your equipment into that limited space.
Ultimately, the best way to set up your recording space depends on many different factors, such as your budget, level of ambient noise, and amount of available space.
Hear voices against your actual script
Free custom auditions from professional voice talent — no commitment.
Is soundproofing all I need to do when building my home studio?
Soundproofing is the first step to building a professional home recording studio, but it’s not all you’ll need to do.
In fact, it’s just one of many tasks involved in optimizing a home recording environment.
Aside from background noises, there are a variety of other acoustic issues that could impact the finished product.
These include the furnishings you have in your studio (or lack thereof) and the type of recording equipment you use.
Will my recording equipment affect the soundproofing of my home studio?
Your recording equipment cannot affect the soundproofing of your home studio.
However, modern plugins shipped nowadays include tools to reduce background noise and reverberation. While they can significantly improve sound quality, it’s best to start with a treated room, as overuse of digital tools introduces unnatural artifacts into the recording.
You can start out with entry-level equipment to save money, but make sure it’s still of professional quality.
The first thing to think about is a microphone.
USB mics are a budget option, but mics with XLR connectors are better for professional use.
Depending on quality and whether you opt for a used or new model, you can expect to spend anywhere from one or two hundred dollars to $1,000+ for a professional microphone.
Is software as important as hardware in my home recording studio?
No. Hardware has a stronger impact on audio quality than software. Inexpensive, or even free, modern DAWs (Digital Audio Workstations) can produce great recordings, but how good they are depends on the hardware’s digital converter quality.
DAWs streamline various aspects of recording, such as editing tracks, removing background noise, and connecting different audio sources.
The right voice over software for you depends on your budget, the features you need, and which programs your clients use.
How do acoustics affect home studio sound quality?
Keeping external sounds out is only half the battle. You also need strategically placed acoustic panels, bass traps, and diffusers within the room, as this will affect the home studio sound quality.
Rooms that are small, symmetrical, or have lower ceilings are more likely to have acoustic issues.
Remember that hard, smooth surfaces tend to reflect sounds more strongly, while soft, textured surfaces like carpets and rugs are more sound-absorbent
Furniture, lamps, TVs, computers, and other items can have a distinct effect on acoustics.
Nowadays, you can buy absorption panels and diffusers at relatively affordable prices to minimize acoustic reflection.
Absorption panels are built with specific materials and densities to absorb mid to high frequencies and minimize sound reflections from the room’s walls.
Diffusers are used to prevent sound waves from building up in certain areas, giving recordings a wide sense of openness.
Finally, bass traps are vital when it comes to acoustics, especially in smaller rooms.
Low-frequency and high-frequency sound waves have very different properties, and conventional absorption panels won’t work as well for lower ranges.
Given their higher energy and longer waveform, they require absorption panels with a much higher density.
Strategically located bass traps help prevent low-frequency build-up and maintain a more balanced sound.
Final thoughts
Setting up your first home studio is a major step, and it can feel overwhelming if you don’t have much experience.
Fortunately, modern equipment has streamlined this process more than ever before.
In 2026, you can create professional recordings at home with relatively small investments of time and money.
With these tips, you’re ready to build a home studio that fits your needs and allows you to pursue your career as a voiceover artist.
If you’re looking to hire a professional voice actor with the ability to produce broadcast-quality audio recordings, don’t hesitate to visit our website and take a listen to our fully vetted, professional voice talent.
Frequently Asked Questions
What is the easiest way to soundproof a home studio?
The easiest way to soundproof a home studio is to first choose a quiet room with minimal noise interference from outside, and then ensure any gaps in doors and windows are fully sealed.
Is soundproofing the same as acoustic treatment?
No. Soundproofing blocks all external noise, while acoustic treatment improves sound quality within a room so that sounds come through as clearly as possible.
What is the most important area to soundproof first?
Doors and windows are the most important, as these are usually where unwanted sounds leak in and out.
Do I need expensive equipment to soundproof a studio?
Not necessarily. Though you can invest in soundproof doors and windows, basic improvements like sealing doors and windows or adding acoustic inserts or soundproof curtains to both can help to block out sound.
Furnishing your studio strategically and ensuring you have professional-grade recording equipment can also benefit the sound quality within a room.
Are isolation booths better than soundproof rooms?
For professional voice talent who have limited space at home, isolation booths can be a more convenient and less intrusive solution, though you will still need to find a space to set up the booth.








2 Comments
Gracias por compartir esta información. Saludos desde COL.
Muchas gracias a ti 🙏